
In just a few steps you too can add a personal and meaningful touch to your holiday decor. One way to do that is by creating Personalized Christmas Stocking Tags Using Cricut! In this post I share the supplies I used and a few project tips to create your own.
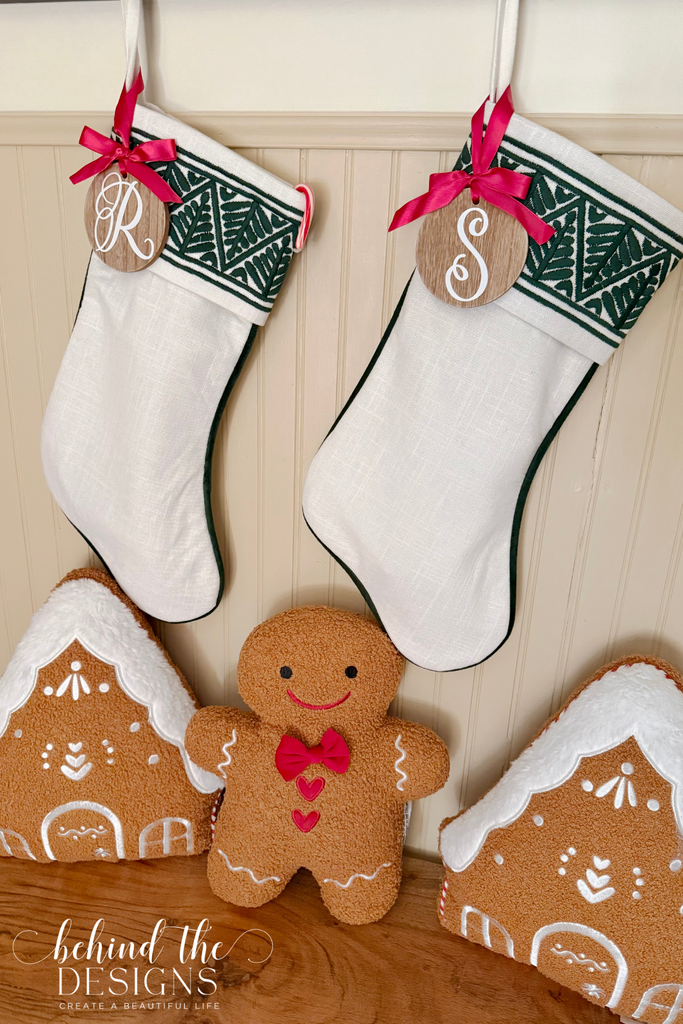
When the time comes to decorate for Christmas, I usually try and change up my theme a little from year to year. But I’ve been kind of stuck on the adorable gingerbread theme for a few years now! Although I also love the traditional red and green at Christmas time.
So, what’s a girl to do? Well, I combined both Christmas decor themes! Why not, right?! I also love how the wood tone of these Christmas stocking tags paired with the “ginger” part of the gingerbread decor.
JOIN MY NEWSLETTER TO RECEIVE…
More Cricut Projects & Ideas for Your Home and Planner
Do you love decorating in a gingerbread theme at Christmas time? If you do be sure to check out my Charming Gingerbread Christmas Tree Theme I put up in my craftroom office one year. It’s packed with inspiring ideas!
If you’ve been around long enough you likely remember my Personalized Snowflake Initial Stocking Tags Using Cricut. It’s really fun to create personalized stocking tags to complement my Christmas decor. Plus this Cricut project was super easy to create!
Supplies
- Wood Stocking Tags with Red Bow (Hobby Lobby #HL9202960)
- Cricut Permanent Vinyl in White
- Cricut Design Space (font: Love Spell)
- Cricut Explore – Cricut Joy – Cricut Joy Xtra
- Cricut Cutting Mat
- Cricut Brayer
- Cricut Weeder Tool
- Cricut Scraper Tool
- Cricut EasyPress
Be sure to check out my Amazon Storefront for some or all of the supplies used in this project and more.
Personalized Initial Stocking Tags
Other than the necessary Cricut tools (that I already had on hand), all I needed to buy were the wood stocking tags. I also kept it simple by reusing the same font I used in the Personalized Snowflake Initial Stocking Tags.
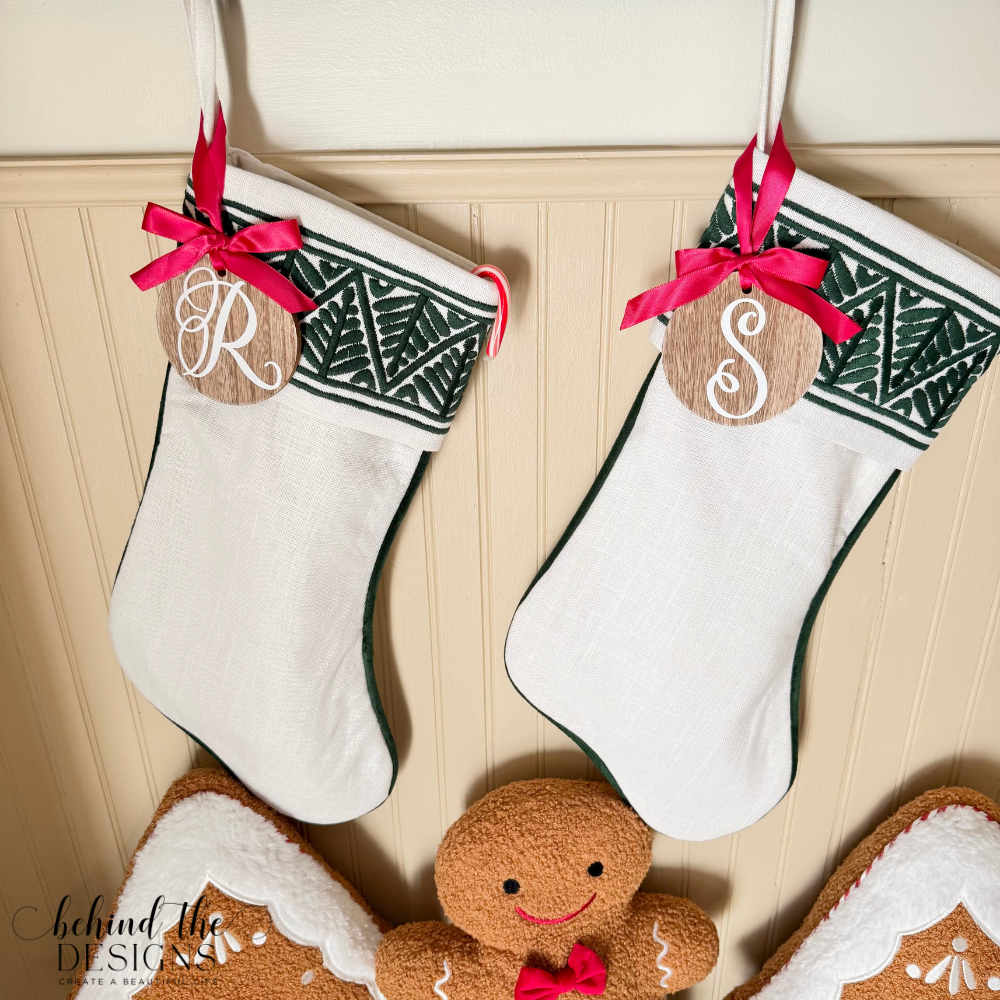
As a side note, we used to hang our stockings down the banister. But with a few little fluffy paws thinking they were toys, we had to move them to hallway mirror. This mirror hangs above a wood bench for guests to sit when they arrive. So it ended up being a perfect little Christmas nook!
Holiday Decor Ideas
Find more holiday decor ideas to create a festive home for any upcoming holiday celebration.
It wasn’t until I was writing this post that I realized that the pattern on the stocking (green embroidered tree) was the same shape as the gingerbread houses. That was an unexpected decor placement that was completely unintentional. But I love it!
For this Cricut project you will cut your vinyl and use transfer tape to adhere it to the wood blank. It’s that easy! I think the hardest part is actually picking a font. But I really love the scroll flourishes of this font…it just feels very Christmas.
Project Tips
- Using Iron-On. You absolutely could try an iron-on vinyl. But be aware that some craft wood blanks don’t take iron-on very well. Be sure to check out my Personalized Charcuterie Board Gift Idea Using Cricut to see what I did to solve that problem.
- Personalize With A Name. It’s doable. Just remember to try different fonts and sizes to make sure you can get the full name onto the wood blank.
- Create A Border. In Cricut Design Space, do an image search for ‘circle border’ and add to your mat. Then size appropriately to your blank. If you plan to use the same color vinyl for both the name or initial and the border, you could cut both at the same time.
- Use Paper Transfer Tape. To avoid any of the craft wood from lifting with the regular transfer tape you could use paper transfer tape. You might just need to peel your transfer tape more gently and make sure the design is adhering as you pull away.
Do you have a project tip? Drop me a comment below, I’d love to hear your ideas!
Were You Inspired To Create Personalized Tags?
Mention us @behindthedesigns or tag us using #btdinspired so we can see your creations! You can also leave a comment below!
Do You Love To Plan?
I invite you to join the Creative Planning Expressions Community and be inspired by all the planner pages, tips and productivity hacks. Also be sure to share your own planner pages and experiences -we’d love to learn from you too!

Want to always be in the know? Be sure to subscribe to the newsletter to receive emails of all the latest blog posts and get the first scoop about any digital printables and freebies.
Join me on Instagram, Pinterest, Facebook and the Creative Planning Expressions Community to see what I’m up to as I Plan One Beautiful LifeTM!

Get 10 Tips To Simplify Your Planner
Whether you are downsizing your planner or just need a new direction and reset for a new quarter.

Behind the Designs planner printables are designed as planning tools to help you stay organized & eliminate overwhelm. Explore the Shop →