
Add a touch of elegance and creativity to your Christmas table using Cricut. There are so many ways to use your Cricut machine to craft the perfect holiday table. In this post I share how to create an elegant Christmas Tablecloth using any Cricut machine.
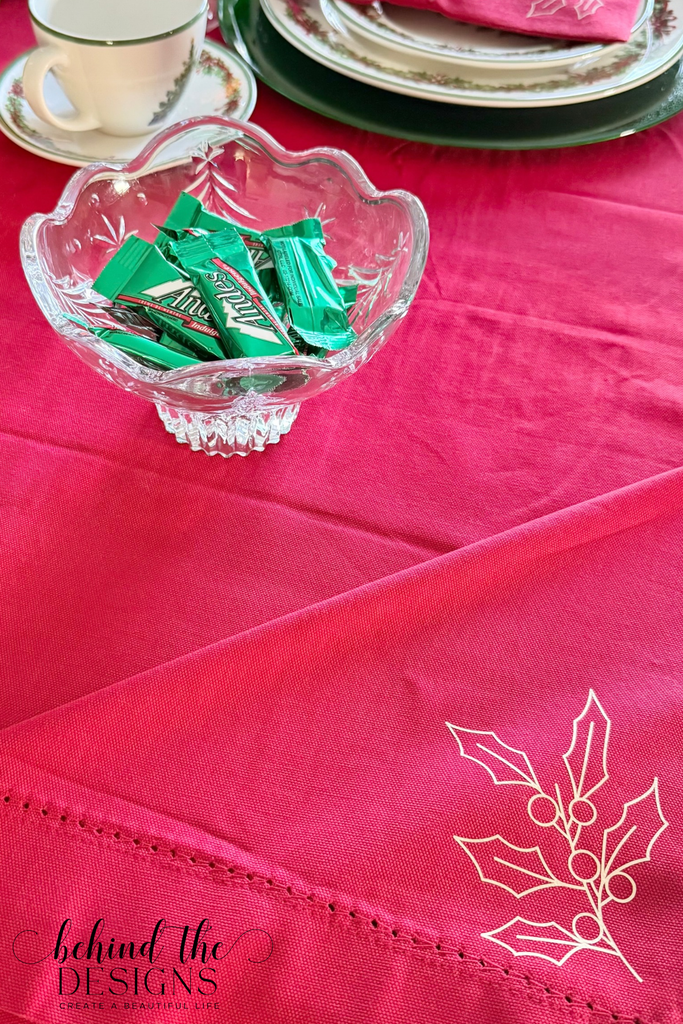
When Christmas time rolls around I can’t wait to start decorating in red. I love this color during this time of year. So naturally when I found this tablecloth at Hobby Lobby it quickly found its’ way into my cart!
Now I really love this Christmas red tablecloth, except…the fabric is super difficult to iron the wrinkles out of. If you’ve read any of my past posts on tablescapes you know that me and tablecloth wrinkles are enemies!
JOIN MY NEWSLETTER TO RECEIVE…
More Cricut Projects & Ideas for Your Home and Planner
So if you have any tips on getting these pesky wrinkles out of tablecloths drop me a comment. I’d love to hear your ironing tips and tricks!
Custom Cricut Christmas Tablecloth
What is really great about this holiday Cricut project is that you could create this custom Christmas tablecloth in less than 15 minutes (not counting the ironing!). It’s a simple, elegant design that really elevates your Christmas table setting and table decor.
Your main supplies are a fabric tablecloth and Cricut holiday design. The holly design image I used in my Cricut project is no longer available in Cricut Design Space. But if you search “holly” you will get a bunch of other great design images to use in your project.
Supplies
- Sleigh Bell Bistro Tablecloth (Hobby Lobby #6336382)
- Cricut Everyday Iron-On Vinyl in Gold
- Cricut Explore – Cricut Joy – Cricut Joy Xtra
- Cricut Cutting Mat
- Cricut Brayer
- Cricut Weeder Tool
- Cricut Scraper Tool
- Cricut EasyPress
Be sure to check out my Amazon Storefront for some or all of the supplies used in this project and more.
1. Iron The Tablecloth
This is the most obvious step and seems kind of silly to even list it. But as you know by now, me and ironing don’t go together. This tablecloth was 100% cotton which means two things.
- It will be difficult to iron and get all the wrinkles out.
- If washed it has the potential to shrink.
In hindsight, I wonder if I had use my Cricut AutoPress if it would’ve worked to get all the wrinkles out. With the AutoPress it might just give enough extra pressure that it gets those pesky wrinkles out.
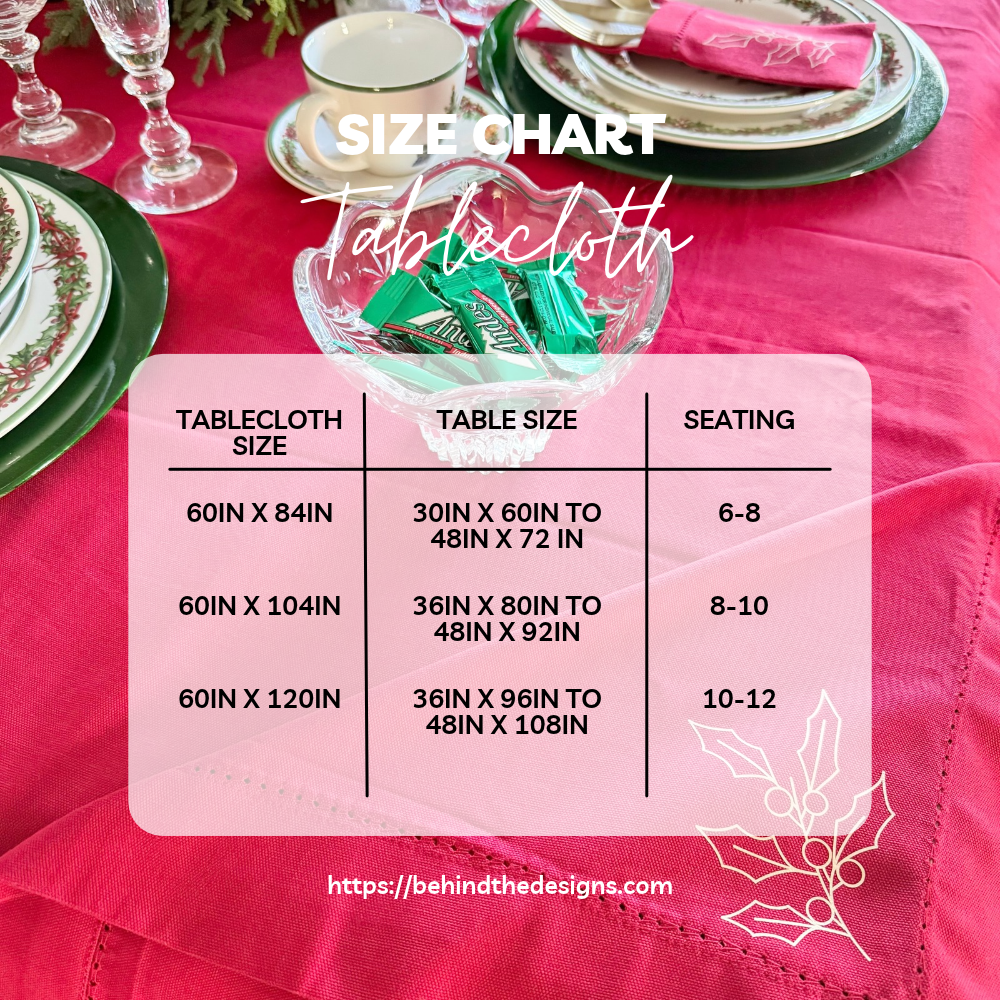
Why does the tablecloth material matter? Well most tablecloths are designed to fit different table sizes and seating counts. Shown above are some of the standard tablecloth sizes.
You can see there are options that cross over each size. For example, if you want your tablecloth to fit the table with just a little drape on the sides, you might choose the 6-8 seating option. If you want more drape on the side then you might consider going up in size to the 8-10 seating size.
But, the material matters because if you are getting a tablecloth that is 100% cotton you might want to go up in size because once you wash and dry it, you’ll likely find it’s a little smaller than when you bought it (or worse a lot!).
Holiday Decor Ideas
Find more holiday decor ideas to create a festive home for any upcoming holiday celebration.
2. Cut and Weed Cricut Vinyl
Since this Christmas tablecloth Cricut Project was small enough, I decided to cut my design on the Cricut Joy. It’s quickly becoming my favorite cutting machine!
The holly design image I used was sized to 3″ x 3.82″ and it fit perfectly in each corner of the tablecloth. This design was also simple which made it a breeze to weed out.
3. Apply Iron-On Vinyl
For my design I used the 9″ x 9″ Cricut EasyPress. I applied heat as it was directed by the type of vinyl I was using. I say this because not all iron-on vinyl uses the same amount of heat time. Always check the recommended use for the vinyl you choose to use in your project.
Read this post for more Cricut Iron-On Tips.
Do You Love To Plan?
I invite you to join the Creative Planning Expressions Community and be inspired by all the planner pages, tips and productivity hacks. Also be sure to share your own planner pages and experiences -we’d love to learn from you too!

Want to always be in the know? Be sure to subscribe to the newsletter to receive emails of all the latest blog posts and get the first scoop about any digital printables and freebies.
Join me on Instagram, Pinterest, Facebook and the Creative Planning Expressions Community to see what I’m up to as I Plan One Beautiful LifeTM!
xo, Stephanie
Get 10 Tips To Simplify Your Planner
Whether you are downsizing your planner or just need a new direction and reset for a new quarter.

Behind the Designs planner printables are designed as planning tools to help you stay organized & eliminate overwhelm. Explore the Shop →