
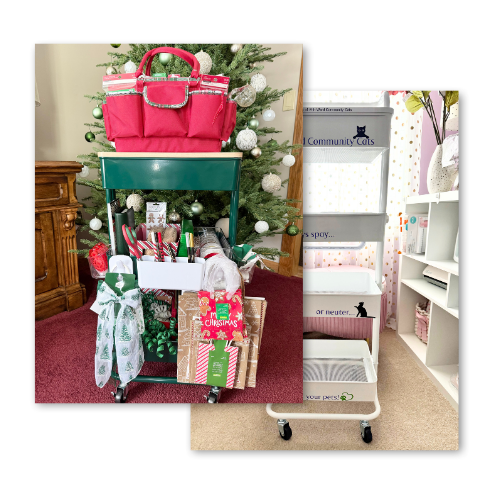
We all know too well how easy Christmas supplies can get out of hand! But what if I told you it’s super easy to organize all your Christmas supplies in one simple craft cart. It’s as easy as gathering your supplies and organizing just three shelves for the perfect Christmas Central craft cart!

We all love Christmas and I know I’m not alone in this. You know, the amount of Christmas supplies taking over every available space in our homes. Every year we buy more and sometimes even worse, we buy again what we already had! Well this past year, I put a halt to that business!
It was then that I decided to create one central location to organize all my Christmas cards, wrapping supplies, gift tags, gift bags, craft supplies and more. Where better to house all these related supplies than a craft cart! While I didn’t need another cart, I did buy this one specifically for this project. It’s easily identifiable and now I know where to go for all things Christmas.
don’t miss out!
Get More Craft Cart Storage Organization Ideas Delivered Straight To Your Inbox!
For extra organization I also added in a few clip-on storage solutions. But before I could even start this project I needed to purge out those supplies that no longer served me or that I didn’t need them anymore. Those items were donated.
There is still the issue with figuring out a solution for my Christmas wrapping paper. I had, well, A LOT. Luckily my daughter took some rolls and I still have more left that could ever fit on this cart. But I’m actively looking for a solution.
It’s really helped to have all my Christmas supplies in one place. Plus, as Mrs. Claus I get to keep this craft cart neat and organized my way. By using a rolling cart I’m also able to take this cart anywhere I am working on gifts and Christmas Crafts.
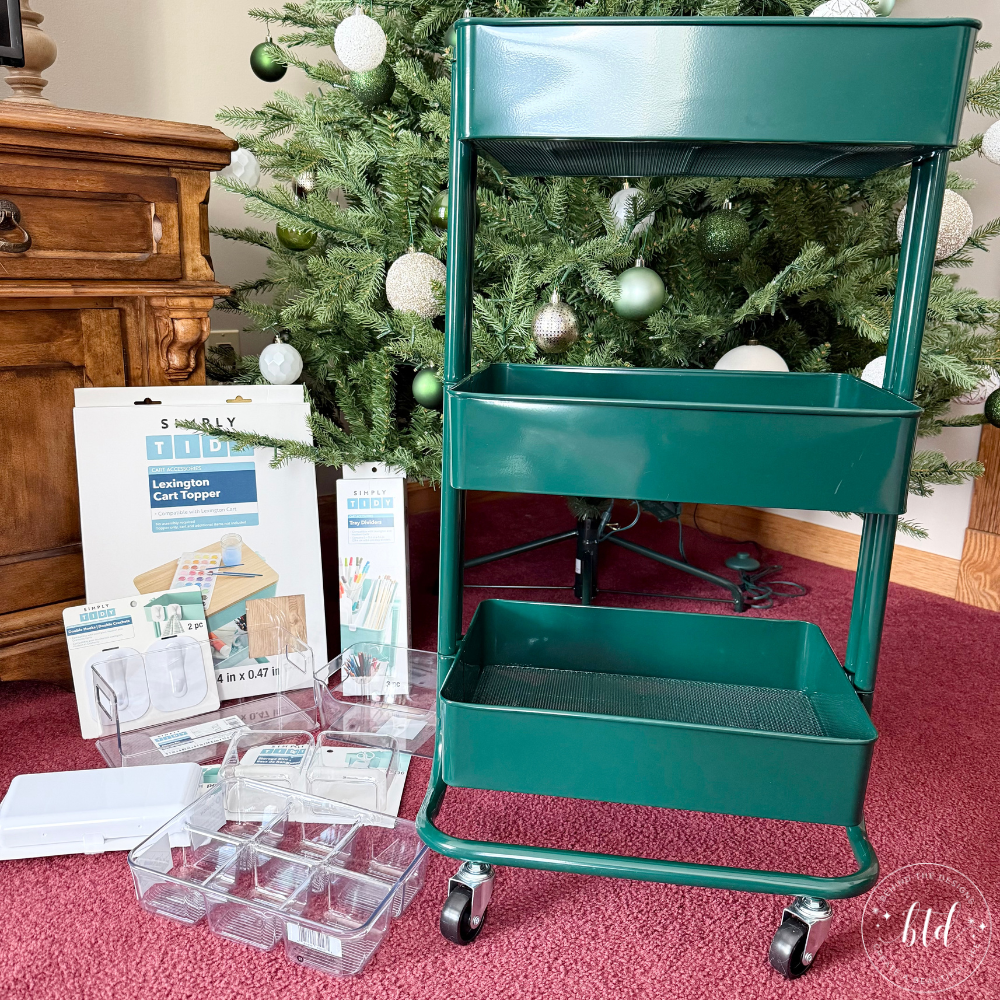
You too can easily create your own Christmas Central Craft Cart! When you shop Michaels they make it super easy to find all the coordinating pieces to their rolling carts. In fact, this craft card was inspired by the Michaels 2025 Gingerbread Forest Christmas theme!
Supplies
- Lexington 3-Tier Rolling Cart by Simply Tidy in Emerald
- Lexington Cart Topper by Simply Tidy in Natural
- White Tray Dividers by Simply Tidy (in this cart setup I didn’t even use these…yet)
- White Cart Divided Bin by Simply Tidy (3.5″ x 7.7″ x 1.8″)
- White Double Cart Hooks by Simply Tidy (6.63″ x 6.63″)
- Clear Hanging Organizer Bins by Simply Tidy (3.6″ x 2.85″ x 3.4″)
- Clear Stackable Storage Bin (perfect for ribbons!) (9.7″ x 4.92″ x 4.1″)
- Clear Craft Storage Bin (7.6″ x 5.2″ x 3.25″)
- Clear 6-Slot Storage Organizer Bin (6.5″ x 9.5″ x 2.5″)
- Everything Mary Red Plaid Christmas Deluxe Store & Tote Organizer Bag (12″ x 8″ x 7.5″)
- Peppermint Lane Christmas Small Gift Bin (optional)
- Peppermint Lane Gingerbread House Gift Bin (optional)
- ALL Your Christmas Wrapping & Gifting Supplies
Be sure to check out my Amazon Storefront for some or all of the supplies used in this project and more.
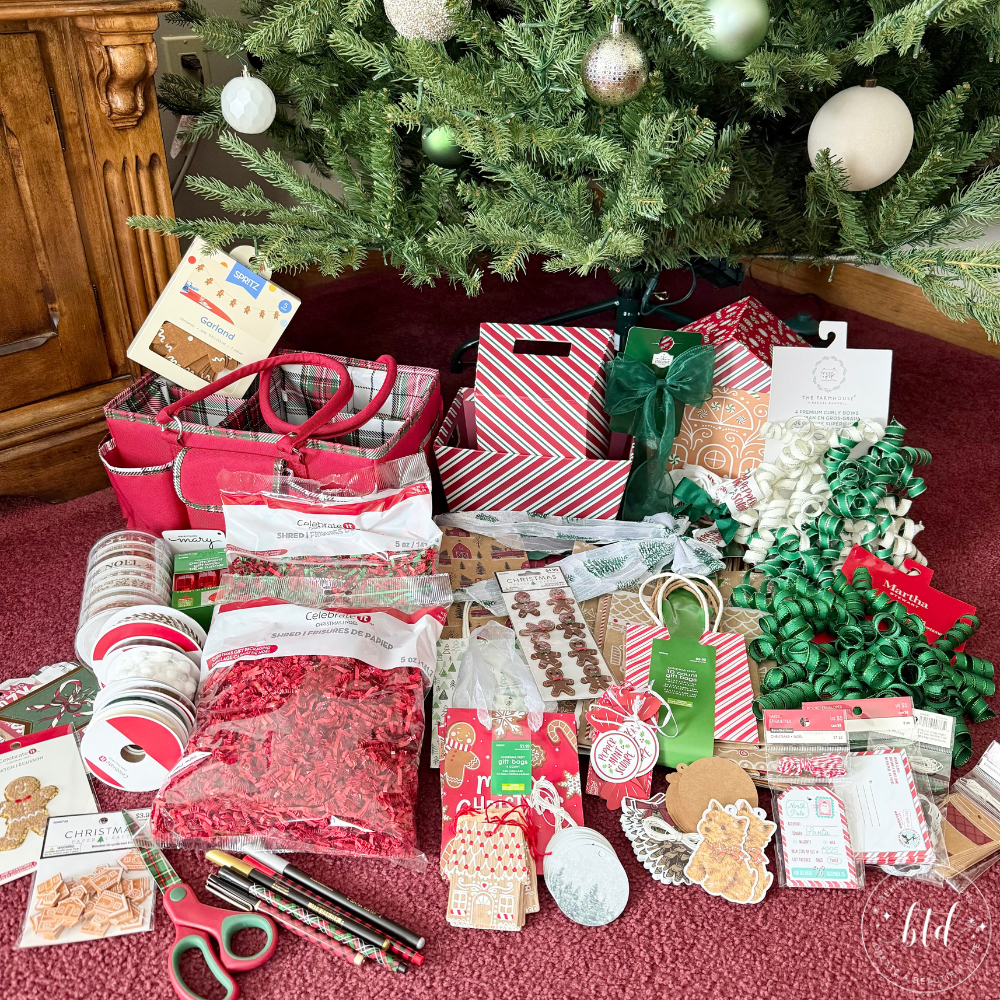
Shown above isn’t even all of the holiday supplies! As I already mentioned, I had decided to filter through my Christmas supplies and pull out what I know I didn’t want or need (those items were donated). From there it was a matter of organizing the supplies by shelf into separate piles.
Setup A Christmas Central Craft Cart
Before even starting you will need to assemble your chosen craft cart. Next gather all your Christmas supplies and filter through what to keep and what to donate. Now you are ready to get organized starting with the top shelf.
Organize The Top Shelf
For this shelf, I planned to use both the craft cart topper and the Everything Mary Organizer Tote. This shelf would include all Christmas cards, holiday scrapbook paper, stamps and diecuts, Christmas gift tags, stickers and more. I even planned to include my fav Esterbrook triple pen nook in moss green to hold my fountain pens.
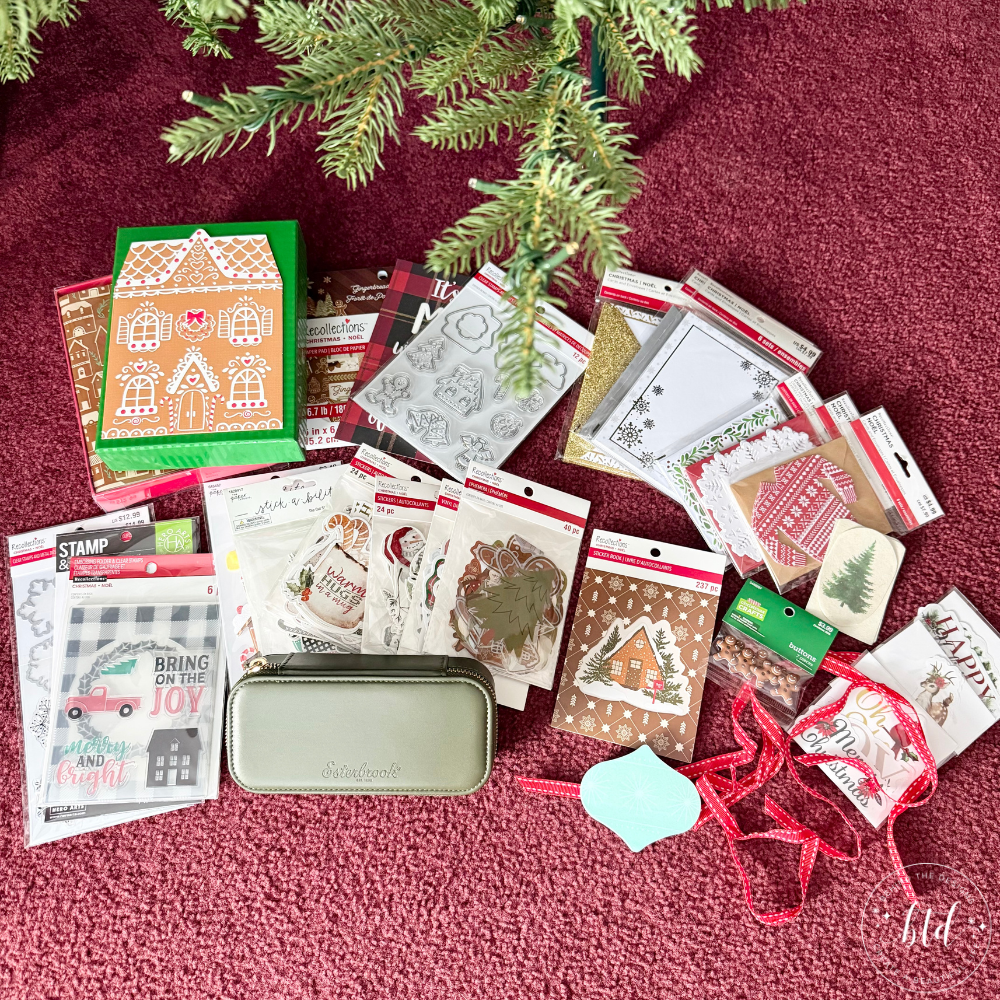
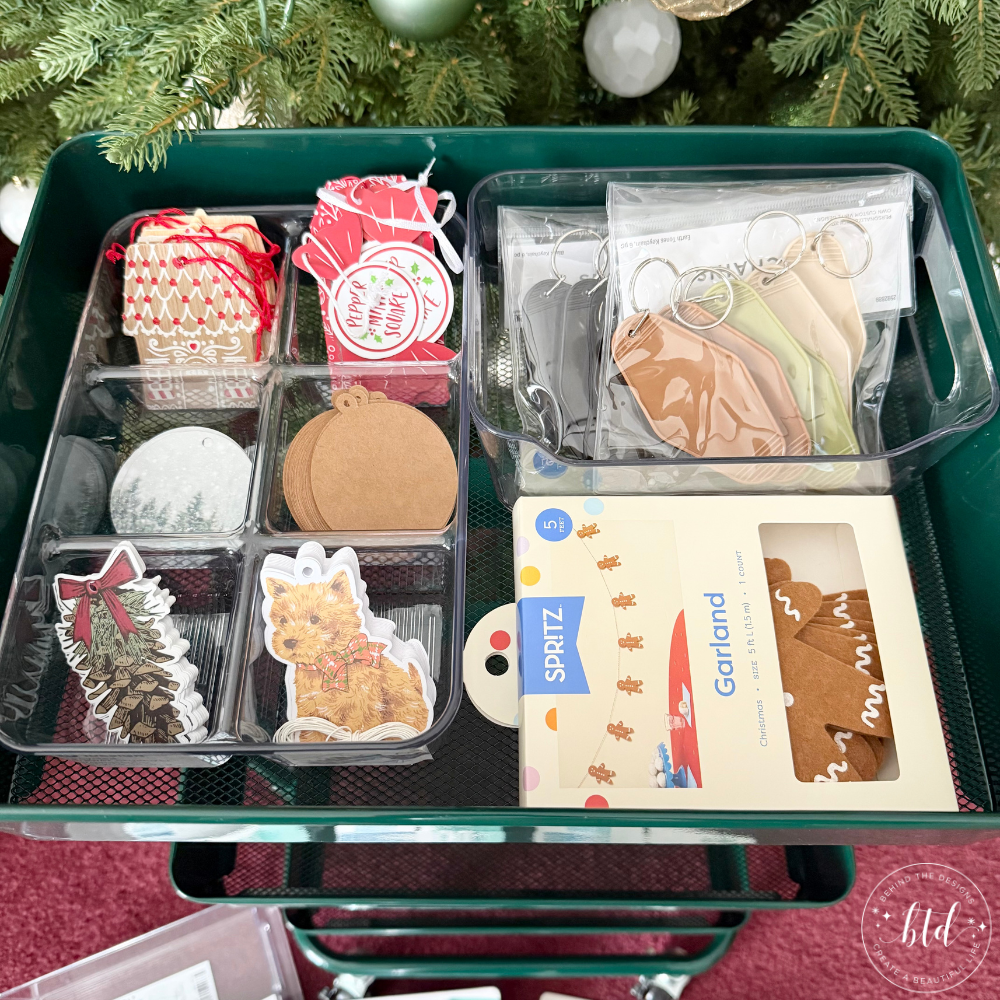
There are two parts to this top shelf -the inside of the shelf and the top after I add the shelf topper. I started with the inside first and used the 6-slot organizer to finally corral all my themed gift tags -and it worked perfectly. Next I added a smaller clear bin to hold some motel keychains that are perfect for Cricut gifts!
Lastly, I added the box of gingerbread garland that I found at a great price because they’d make sweet gift toppers!
By adding the wood craft cart topper you essentially add another shelf to your 3-tier rolling cart! This is where I will house my Everything Mary Red Plaid Christmas Organizer Tote.
So let’s talk about what’s inside this organizer tote…can we say everything! It fits so much!
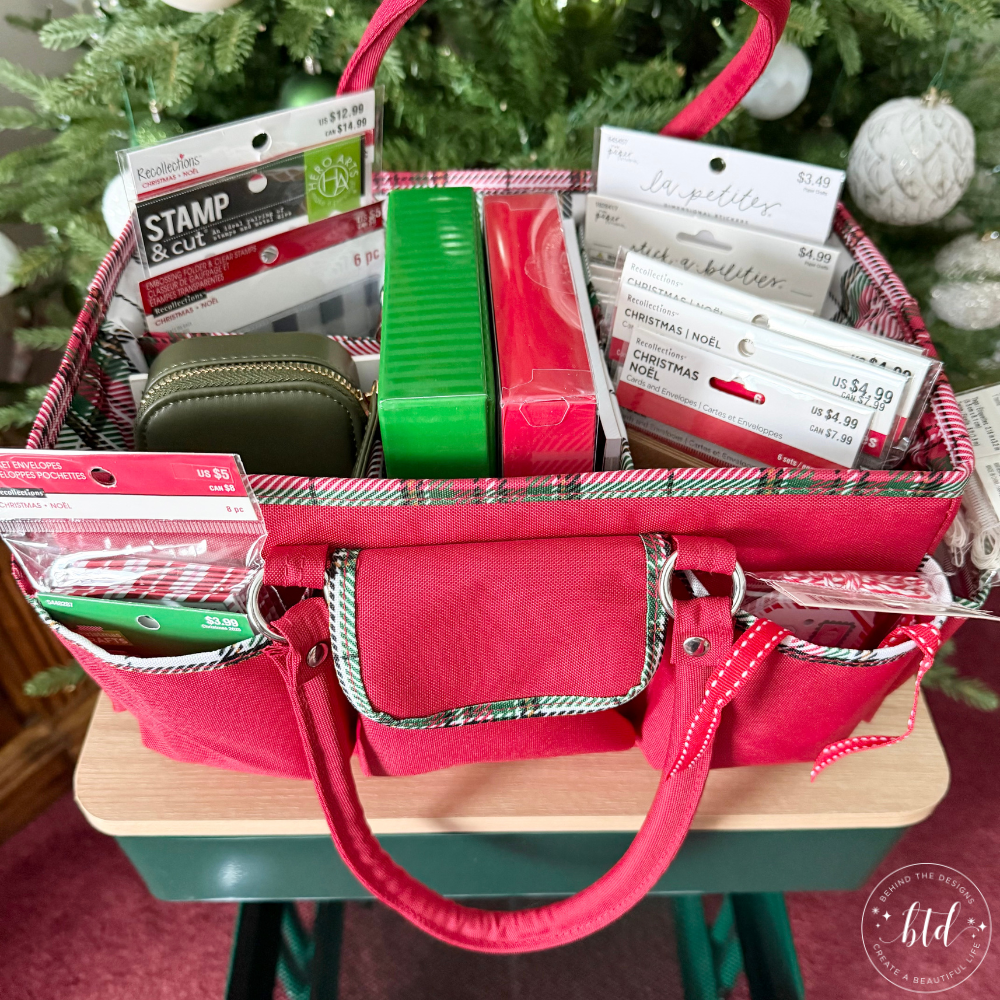
Here is a list of what’s inside:
- Two boxes of Christmas cards;
- A pad of 6×6 Gingerbread Forest scrapbook paper;
- Numerous packages of stickers, stamps, embossing folders, all the Christmas craftables, etc;
- My Esterbrook triple pen nook for my fountain pens (I like fancy Christmas cards…what can I say?!);
- A pair of small red foldable scissors;
- The remaining gift tags that I wanted to keep but didn’t have room for in the main 6-slot organizer.
This organizer tote is holding upwards of 25 packages of Christmas goodies and there is still so much room left to store more! Which I’m sure I’ll take advantage of in the coming years.
Organize The Middle Shelf
Although this craft cart was inspired by the Gingerbread Forest Collection from Michaels, I did find these adorable peppermint stripe small gift bins from their Peppermint Lane Collection. Since I had a gingerbread theme going on I decided they’d be perfect!
What goes together better than peppermint and gingerbread?! You can see how much I love a gingerbread theme in my Charming Gingerbread Christmas Tree Theme setup in my craft room.
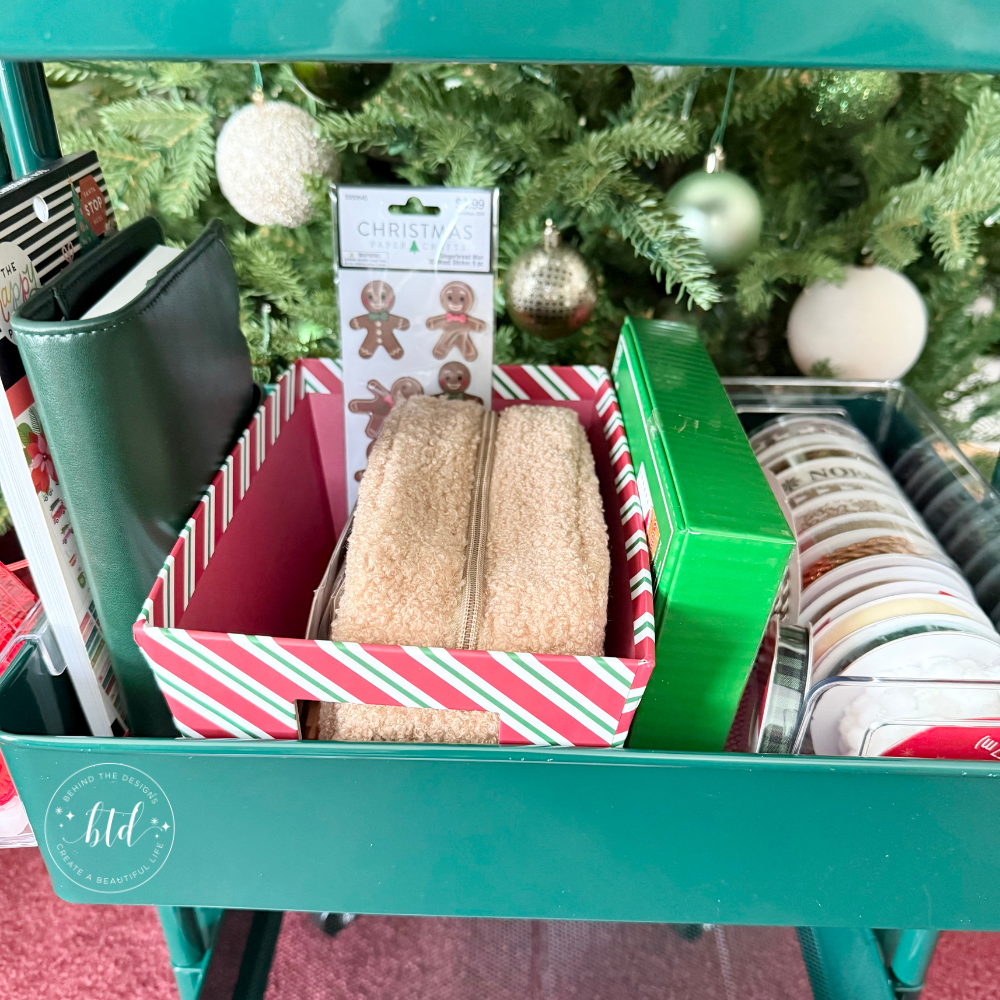
In this shelf I’ve placed the following supplies:
- Happy Planner Christmas Stickers;
- My B6 Stalogy in an Emerald Green B6 Airy Planner Cover from Aura Estelle;
- Brown Shearling Zippered Pouch;
- Christmas Themed Patches;
- Gingerbread Men Wood Stickers;
- An extra box of Christmas Cards (I bought multiples of the same design);
- Christmas Ribbons.
I setup this middle shelf as sort of a project shelf. In my B6 Stalogy I would keep all my holiday projects organized plus I’ve got some Happy Planner stickers to decorate the pages. There is a specific project for the shearling pouch and I wanted to keep all the pieces together.
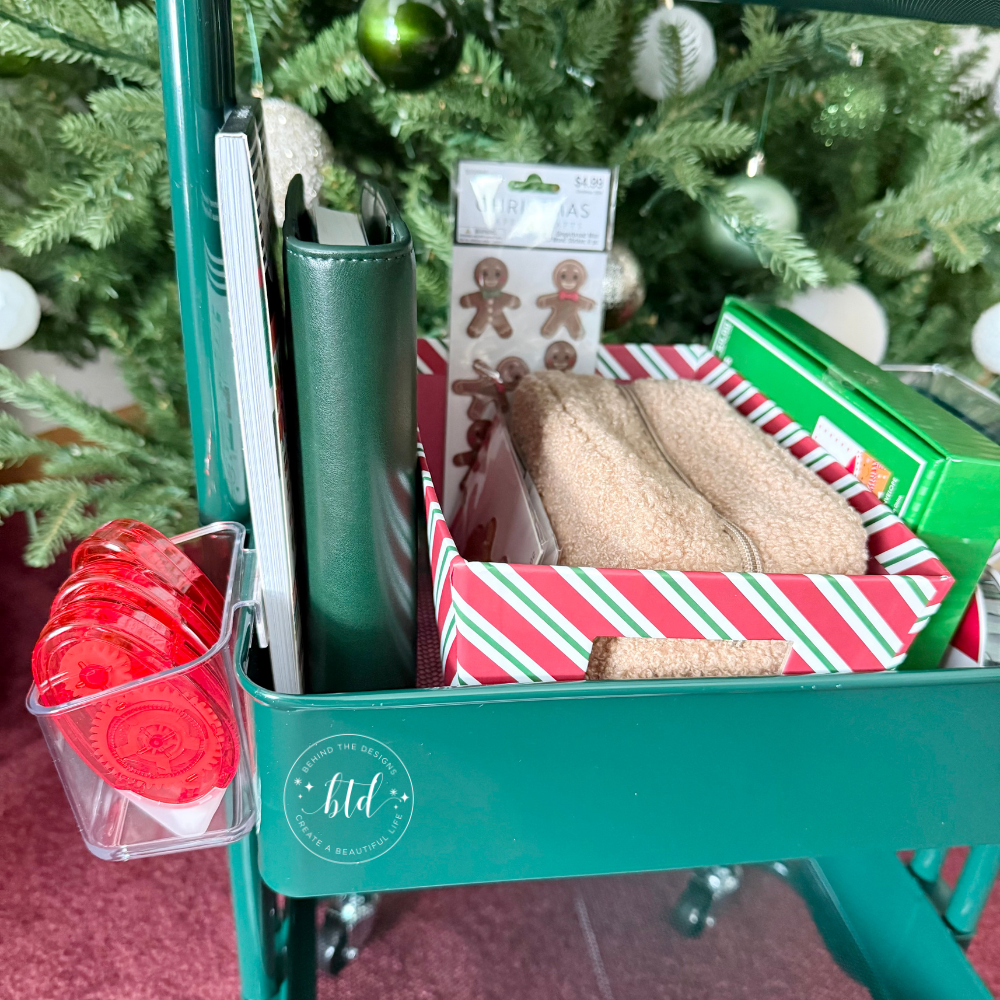
On the left, outside of the bin, I’ve clipped a clear storage bin organizer. I’m using it to hold my permanent gift wrap tape runner that I found at Hobby Lobby.
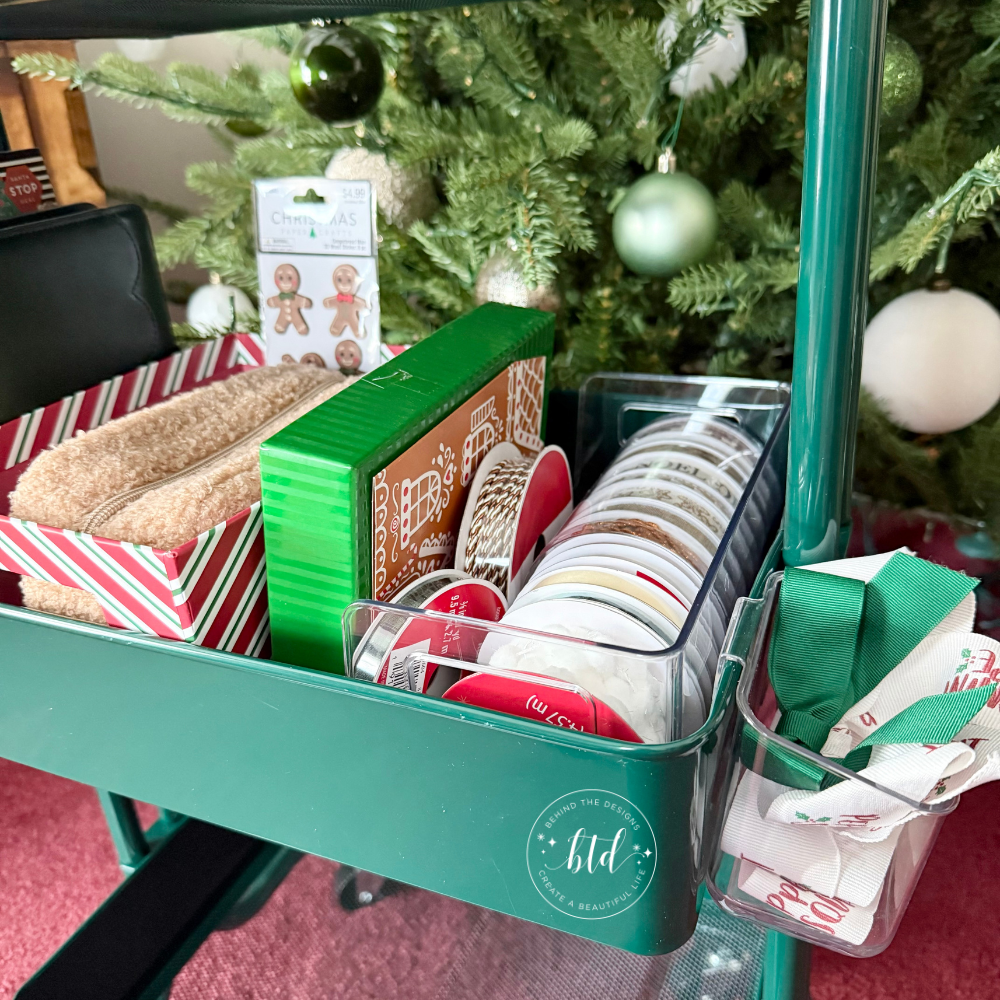
On the right, outside of the bin, I clipped the other clear storage bin to hold extra ribbon pieces and ribbon bows.
Craft Cart Organization tip
If you use the storage organizer bins that clip onto the sides of the cart, be careful of sliding them around, putting them on and removing them. I found they will mark up the paint on the cart. If you look closely you can see this on the pictures.
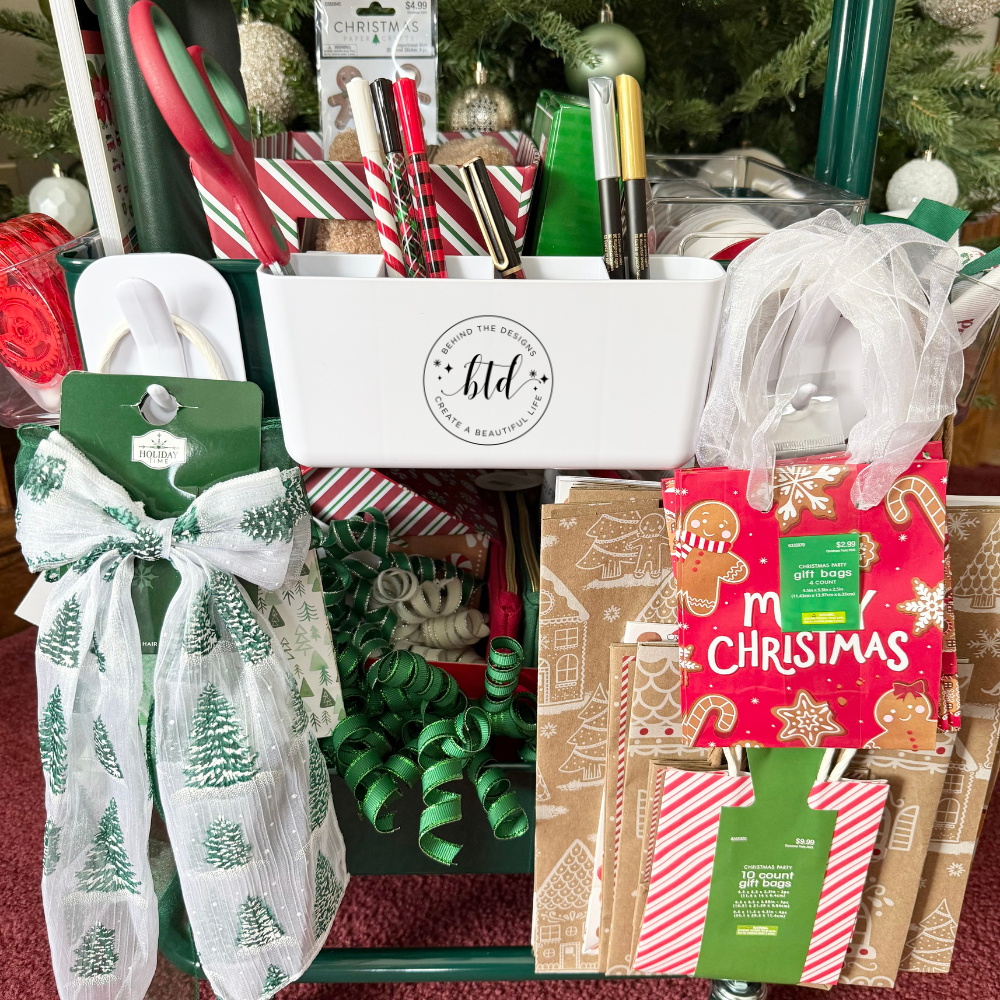
On the front, outside of the bin, I clipped a double hook on each end. One hook holds what are actually hair bows from Walmart, but I could easily modify them to use in a holiday craft. The other hook holds holiday kraft gift bags in various sizes.
The middle white organizer bin holds my Christmas plaid scissors from Hobby Lobby and a number of holiday pens and markers perfect for writing in cards or my Christmas project planner.
Watch The Full Christmas Central Craft Cart Setup
The latest on Youtube:
Organize The Bottom Shelf
In the bottom shelf I made sure not to put anything that I needed to grab earlier in the holiday season. That was because with the gift bags and bows hanging down, it does hide this bottom shelf a little bit.
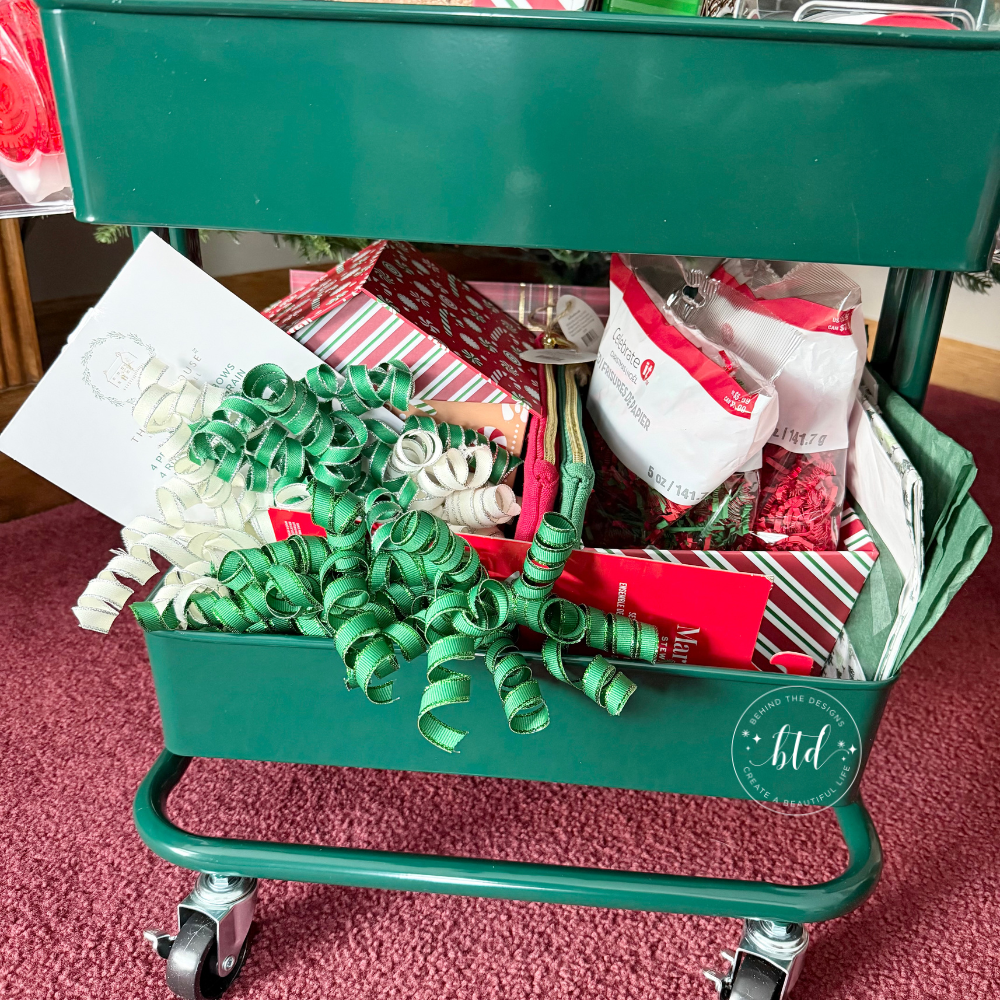
In this shelf I placed a somewhat large Peppermint Lane Gingerbread House that is actually a gift box. But I’ll use it to hold my seasonal supplies.
Also included on this shelf are:
- Curled fabric ribbon gift toppers by The Farmhouse by Rachel Atwell (found these at Marshalls);
- A couple holiday zipper pouches (perfect for gift giving);
- Another Peppermint Lane small gift bin that holds some holiday paper shreds for gift boxes;
- 2 packages of holiday themed tissue paper.
I absolutely love my new Christmas Central Craft Cart! By the time I got this craft cart setup last year I wasn’t able to get much use of it. But this year…it’s game on!

Note: Take your Christmas Central Craft Cart to the next level by customizing with Cricut vinyl. Use labels to indicate what is in each shelf or decorate the craft cart in a holiday theme.
What was your favorite part of this Christmas Central Craft Cart project? I’d love to hear your thoughts! Drop me a comment below.
Were You Inspired To Create a Christmas Central Craft Cart?
Mention us @behindthedesigns or tag us using #btdinspired so we can see your creations! You can also leave a comment below!

Want to always be in the know? Be sure to subscribe to the newsletter to receive emails of all the latest blog posts and get the first scoop about any digital printables and freebies.
Join me on Instagram, Pinterest, Facebook and the Creative Planning Expressions Community to see what I’m up to as I Create a Beautiful LifeTM!

Get Creative Planning Inspiration Inside Our Community
Join our growing community of planner enthusiasts inside our Facebook community. In this group you will find like-minded women who share their productivity tips, planner pages, and real-life planner solutions and tips.